Oat Coconut Cookies

oatcookie.JPG

This recipe is adapted from the Little Bird Goodness Oat Coconut Cookie Recipe. If you’re looking for a fantastic alternative that you can buy off the shelf, don’t go past the Little Bird Cookies. They taste great and are packed full of goodness.

Oat Cocnut Cookies

Makes 12 cookies

Ingredients:

1/3 cup of ground flaxseed or LSA or Ceres Superseed Blend

1 1/2 cups of rolled oats

1 cup of desicated coconut

1 cup of coconut sugar

2 pinches of sea salt

2 tsp of ground cinammon

1 cup of pitted dates

2T melted coconut butter

1/3 cup of melted extra virgin coconut oil

1 tsp vanilla extract

3/4 cup of filtered water

OPTIONAL:

Add 1/3 cup of dark chocolate chip or more if you wish, to make a choc chip version

Add 1/3 cup of dried apricots or raisins or more if you wish to make a fruit oat version

Directions:

  1. Preheat the oven to 180degrees celcius.

  2. Grind 1/2 cup of the oats into a flour. Do this by placing them in a high speed blender or food processor. If you only have whole flaxseeds you can also grind these into a flour using a blender or food processor.

  3. In a bowl combine the ground flaxseed or LSA or super seed blend with the oat flour you just made and the remaining rolled oats. Add the desicated coconut, coconut sugar, salt, fennel and cinnamon and mix together.

  4. In a food processor or blender process the dates til they form a paste (add some water if necessary). Then add the melted coconut butter and coconut oil and pulse. Once combined add the vanilla extract and water and pulse a few more times. Don’t worry if you have a few chunks of dates in there.

  5. Add the wet ingredients to the dry and mix with a spoon until they are well combined.

  6. If you wish to add choc chips or dried fruit, cut them small and add them at this point.

  7. Take 1 dessert spoon of dough and roll it into a ball. Place it on a lined baking try and press it down to form round cookies that are approximately 5mm thick.

  8. Bake the cookies for 25mins. Take them out of the oven and leave to cool.

  9. You can store these cookies in an airtight container for several weeks.

Lamb Shank Stew

lambshanks.jpg

This is perhaps my favourite winter recipe. The lamb shanks are a superb source of iron and good quality fats. This cut contains a lots of connective tissue and bone marrow, which is packed with nutrition and when slow cooked it tastes incredible.

I like to serve this dish with a heap of cooked winter greens. Broccoli, kale, spinach and beans. You’ll need veges to break up the heaviness of the meat and the sauce. This recipe also goes great on cauliflower rice, but avoid the cauliflower, kale and broccoli when you are experiencing a lot of wind, as vegetables from the brassica family can be difficult to digest. If this is you, consider serving the stew on a bed of mashed carrot and parsnip, perhaps with a salad on the side.

Slow Cooked Lamb Shanks

4 shanks is 6 servings

Ingredients:

4 large lamb shanks

1 tsp ground cinammon

1 tsp ground cumin

1 tsp ground coriander

1/2 tsp salt

1/4 tsp freshly ground black pepper

1 onion

6 cloves garlic

400g or 1 can of chopped tomatoes or 6 large tomatoes chopped finely

1 1/2 cups of vege stock

2 large kumara, cut into cubes

1 large carrot, roughly chopped

16 prunes, chopped into quarters

Olive Oil

Bunch of Italian parsley, finely chopped

Directions:

  1. Combine cinammon, cumin, coriander, salt and pepper in a bowl. Rub a little olive oil on each shank and then coat with the spice mixture. Press the spices into the meat as much as possible. Cover and leave to rest for at least 1hr.

  2. Preheat the oven to 175 degrees celcius.

  3. In a large frying pan, heat a glug of olive oil and brown the lamb shanks on all sides. You will need to do this in batches in order to avoid overcrowding the frypan. Remove the shanks and place them in a large casserole dish and set aside.

  4. Add another glug of oil to the frying pan and cook the onion and garlic until it is translucent (approx 5 mins).

  5. Then add the tin of chopped tomatoes, the chopped carrot and kumara, the prunes and the vege stock.

  6. Mix thoroughly and cook on a medium heat for 5mins.

  7. Pour this mixture over the lamb shanks in the casserole dish.

  8. Put a lid on the casserole dish and place in the oven for 2 1/2 hrs. Turn the shanks halfway through.

  9. After 2 1/2 hrs check the casserole, ensuring it is nearly cooked and that there is still some liquid in the stew. Take the lid off the dish and cook for a further 20-30mins in the hot oven. This final process browns the meat, and has it falling off the bones.

  10. After three hours take it out of the oven. Sprinkle the italian parsley on the top and serve on a bed of veges, cauliflower rice, or mashed carrot and parnsip.

Beetroot Burger Patties

Beetroot_Burgers.jpg

Every now and then I get a serious craving for a juicy burger. The trouble is, the combo of white wheaty bun, plus cheese, plus red meat, is not a combo that sits well with the digestion. At a certain point I realised that the thing I was really craving was the juicy meat patty, combined with fresh salad (gherkins of course) and lashings of mayo.

So I set out to create a juicy meat patty, that is packed full of veges that help the digestion of the iron in the meat, tastes amazing, and seriously satisfies my craving. Hence this recipe for beetroot burger patties. I usually serve it with a fresh green salad packed with raw veges, as well as a big dollop of mayo or tahini dresssing. In winter I’ll stir fry some green veges to eat on the side. If the burger craving is just too much, buy gluten free burger buns from Venerdi or another alternative bakery and swap out the cheese for mayo.

Beetroot Burger Patties

Makes 6-8 patties

Ingredients:

450g beef mince (premium)

1/2 beetroot, grated

1 courgette, grated

1/2 bunch parsley, chopped finely

1T of olive oil

1 onion

3 cloves of garlic

1tsp cumin

3tsp salt

1/2 tsp freshly ground black pepper

1-2 eggs depending on the consistency of the mixture

Directions:

  1. Dice the onion finely and crush the gloves of garlic. Place in a frypan with a glug of olive oil and fry on medium temperature until the onions are translucent (approximately 5 mins later). Take off the heat and add to a mixing bowl.

  2. Grate the courgette and the beetroot and then press out the water between two paper towels, so the veges are as dry as possible. Add them to the same mixing bowl.

  3. Add the mince , the cumin, the finely chopped parsley, the salt and the pepper to this bowl and mix until all the ingredients are evenly distributed. This recipe calls for a lots of salt, make no mistake. Use a good quality sea salt. Beef needs a lot of salt to bring out the flavour of the meat.

  4. Crack two eggs in a bowl and mix them together lightly with a fork. Add as much of this mixture to the rest of the ingredients to get the right consistency for the burger patties. They should be bound but not too soggy, it may be the equivalent of 1 1/2 eggs, but it depends on the water content of your mince and your vegetables.

  5. Take approx 1/3 cup of this mixture and pat it into circular burger patties that are around 2cm thick. Continue to make patties until your mixture is finished.

  6. Store excess patties in the freezer in ziplock bags with baking paper between them.

  7. To cook the patties, heat a fry pan to medium-high heat (around 7/10), add a glug of olive oil or coconut oil, and fry at this temperature, flipping the patty after approximately 4 mins on each side. Take off the heat and allow to rest for a few minutes before serving.

Jamie Oliver's Lemon Roast Chicken

roastchicken.jpg

Jamie Oliver is one of my food heroes. He’s been a pioneer in moving the western world back toward cooking healthy meals at home and having fun while doing it. His recipes are also generally fail safe and clever, so if ever I google a recipe idea and an option of his comes up, I’m likely to jump on it.

Roast chicken is one of the first meals I ever learnt to prepare, and I still find it one of the easiest ways to feed a large amount of people without spending hours in the kitchen before the event or during. This is a simplified version of the Jamie Oliver recipe, without the roast potatoes. These days I favour kumara and pumpkin as they have a lower glycaemic index, and are less likely to cause blood sugar spikes and inflammation.

Roast chicken is also amazingly versatile. I use the leftover bones to make chicken stock and chicken soup. I save the leftovers of the drier meat to make chicken tacos, chicken salad or chicken wraps. Not a single bite is not utilised!

Chicken is one meat that I’m pretty keen to eat organic. Ordinary chicken is pumped full of antibiotics and hormones to make it bigger and tender, and the residue in the meat has a very negative impact on our gut and hormonal health. Bostocks is the most common organic brand in New Zealand, but hopefully in time there will be more options for the consumer.

Lemon Roast Chicken

Serves 6

Ingredients:

1 whole chicken (organic or free range if possible)

Sea salt

Freshly ground black pepper

1 large lemon , preferably unwaxed

1 whole bulb garlic , broken into cloves

1 handful fresh thyme leaves (optional)

Olive oil

Directions:

  1. Pat the chicken dry and then rub the chicken inside and out with a generous amount of sea salt and freshly ground black pepper. Leave to rest in the fridge for 1 hour if possible and preferably up to 3 hours.

  2. Preheat the oven to 190 degrees celcius on fan bake.

  3. Take the chicken out of the fridge and rub it with olive oil. Quarter the lemon and place that into the cavity of the chicken along with as many cloves of garlic as you can fit in there, and the fresh thyme leaves.

  4. Cook for approximately 45mins on fan bake in the oven, until the chicken is thoroughly cooked. Make sure you use a skewer to ensure the chicken is cooked through.

  5. If you wish to serve with roast veges, add the potatoes, kumara, or pumpkin 10mins into the cooking time. The fat from the chicken will add wonderful flavour to the vegetables.

Vietnamese Chicken Curry

vietnamesechicken.JPG

This is a recipe that has been adapted from the “I Quit Sugar for Life” book by Sarah Wilson. This chick was a pioneer in the movement towards minimising sugar in our diet, and her books are still very relevant today. Her recipes are uber practical and super clean, so if you can get your hands on them I recommend them highly as no fuss cookbooks.

This is a slow cooker recipe, which is an incredibly easy way to make food that is ready to rock when you get home from work, or to prepare early in the day before the witching hours with the kids. My slow cooker and my high speed blender are the two kitchen appliances I can’t live without (after the diswasher of course!) . If you don’t have a slow cooker simply place in an oven proof dish with a lid in the oven.

Vietnamese Chicken Curry

Serves 4

Ingredients:

700g chicken thighs or chicken pieces with the bone left in (free range chicken and organic if possible)

1 stalk of lemongrass or 1T minced lemongrass

2 cloves garlic, minced

3cm knob of fresh ginger minced, or 1T minced ginger from a jar

2T fish sauce

1/3 cup of Massaman curry paste

1 cup of chicken or vege stock

3 medium sweet potatoes cut into 3cm chunks

1 large carrot cut into 3cm chunks

1 white onion cut into 3cm chunks

400ml can of coconut milk

2 bay leaves

Coriander to garnish

Directions:

  1. Place the chicken, lemongrass, ginger, garlic, fish sauce and half the curry paste in a bowl and toss to combine. Marinate in the fridge for minimum 1 hour but preferably overnight.

  2. Add this mixture to your slow cooker or oven proof dish. Then add the stock, the rest of the curry paste, the coconut milk, the bay leaves and the chopped up veges. Stir to combine.

  3. If using the slow cooker cook on high for 4hrs or on low for 8hrs. If using the oven, preheat the oven to 150 degrees celcius on fan bake, and cook for approximately 5hrs in an oven proof dish with the lid on.

  4. When cooked, garnish with a heap of coriander and serve on a bed of cauliflower rice or brown rice.

Spring Green Soup

green soup.jpg

This green soup is packed with every green leafy vegetable you can think of, and is the most incredible hit of goodness. The recipe calls for vegetable stock, but if you’re feeling like extra fortification you can always swap that for organic chicken stock instead.

Very typically when our gut is misbehaving, our immune system can take a hit and coughs and colds can become common place. Looking after your nervous system and feeding your body good nutrition will help remedy this situation, providing you with greater resilience. This simple recipe is a go-to when your immunity needs a boost.

Spring Green Soup

Serves 4

Ingredients:

1T olive oil

1 large onion, roughly chopped

2 garlic cloves, crushed

1 leek, white part only

2 large courgette, chopped finely

1/2 large heap of broccoli, cut into florets and stems chopped

1 bulb of fennel, cut into 1cm pieces

1 1/2L vegetable stock

1tsp ground coriander

1tsp ground cumin

1/2 tsp chilli flakes

Sea salt and pepper

2 cups baby spinach leaves

3 kale leaves, stems removed and leaves torn

1/2 cup mixed herbs - coriander, mint, flat leaf parsley, roughly chopped

Freshly squeezed lemon to serve

Directions:

  1. Heat the olive oil in a large saucepan over a medium heat. Add the onions, leek, and garlic and cook for 5 mins until they have softened.

  2. Add the courgette, broccoli and fennel and cook for a further 5 mins.

  3. Pour in the stock and add the spices - coriander, cumin and chilli flakes. Season generously with salt and pepper.

  4. Bring to a boil, reduce the heat and simmer for 12mins.

  5. Add the torn kale leaves and simmer for a further 5mins, adding more stock if necessary.

  6. Add the spinach leaves and simmer for 1 minute before removing from the heat.

  7. Use a stick blender or a high speed blender to blend the soup until smooth.

  8. Ladle into bowls, garnish with the chopped fresh herbs and a generous squeeze of lemon.

Brown Rice Vege Soup

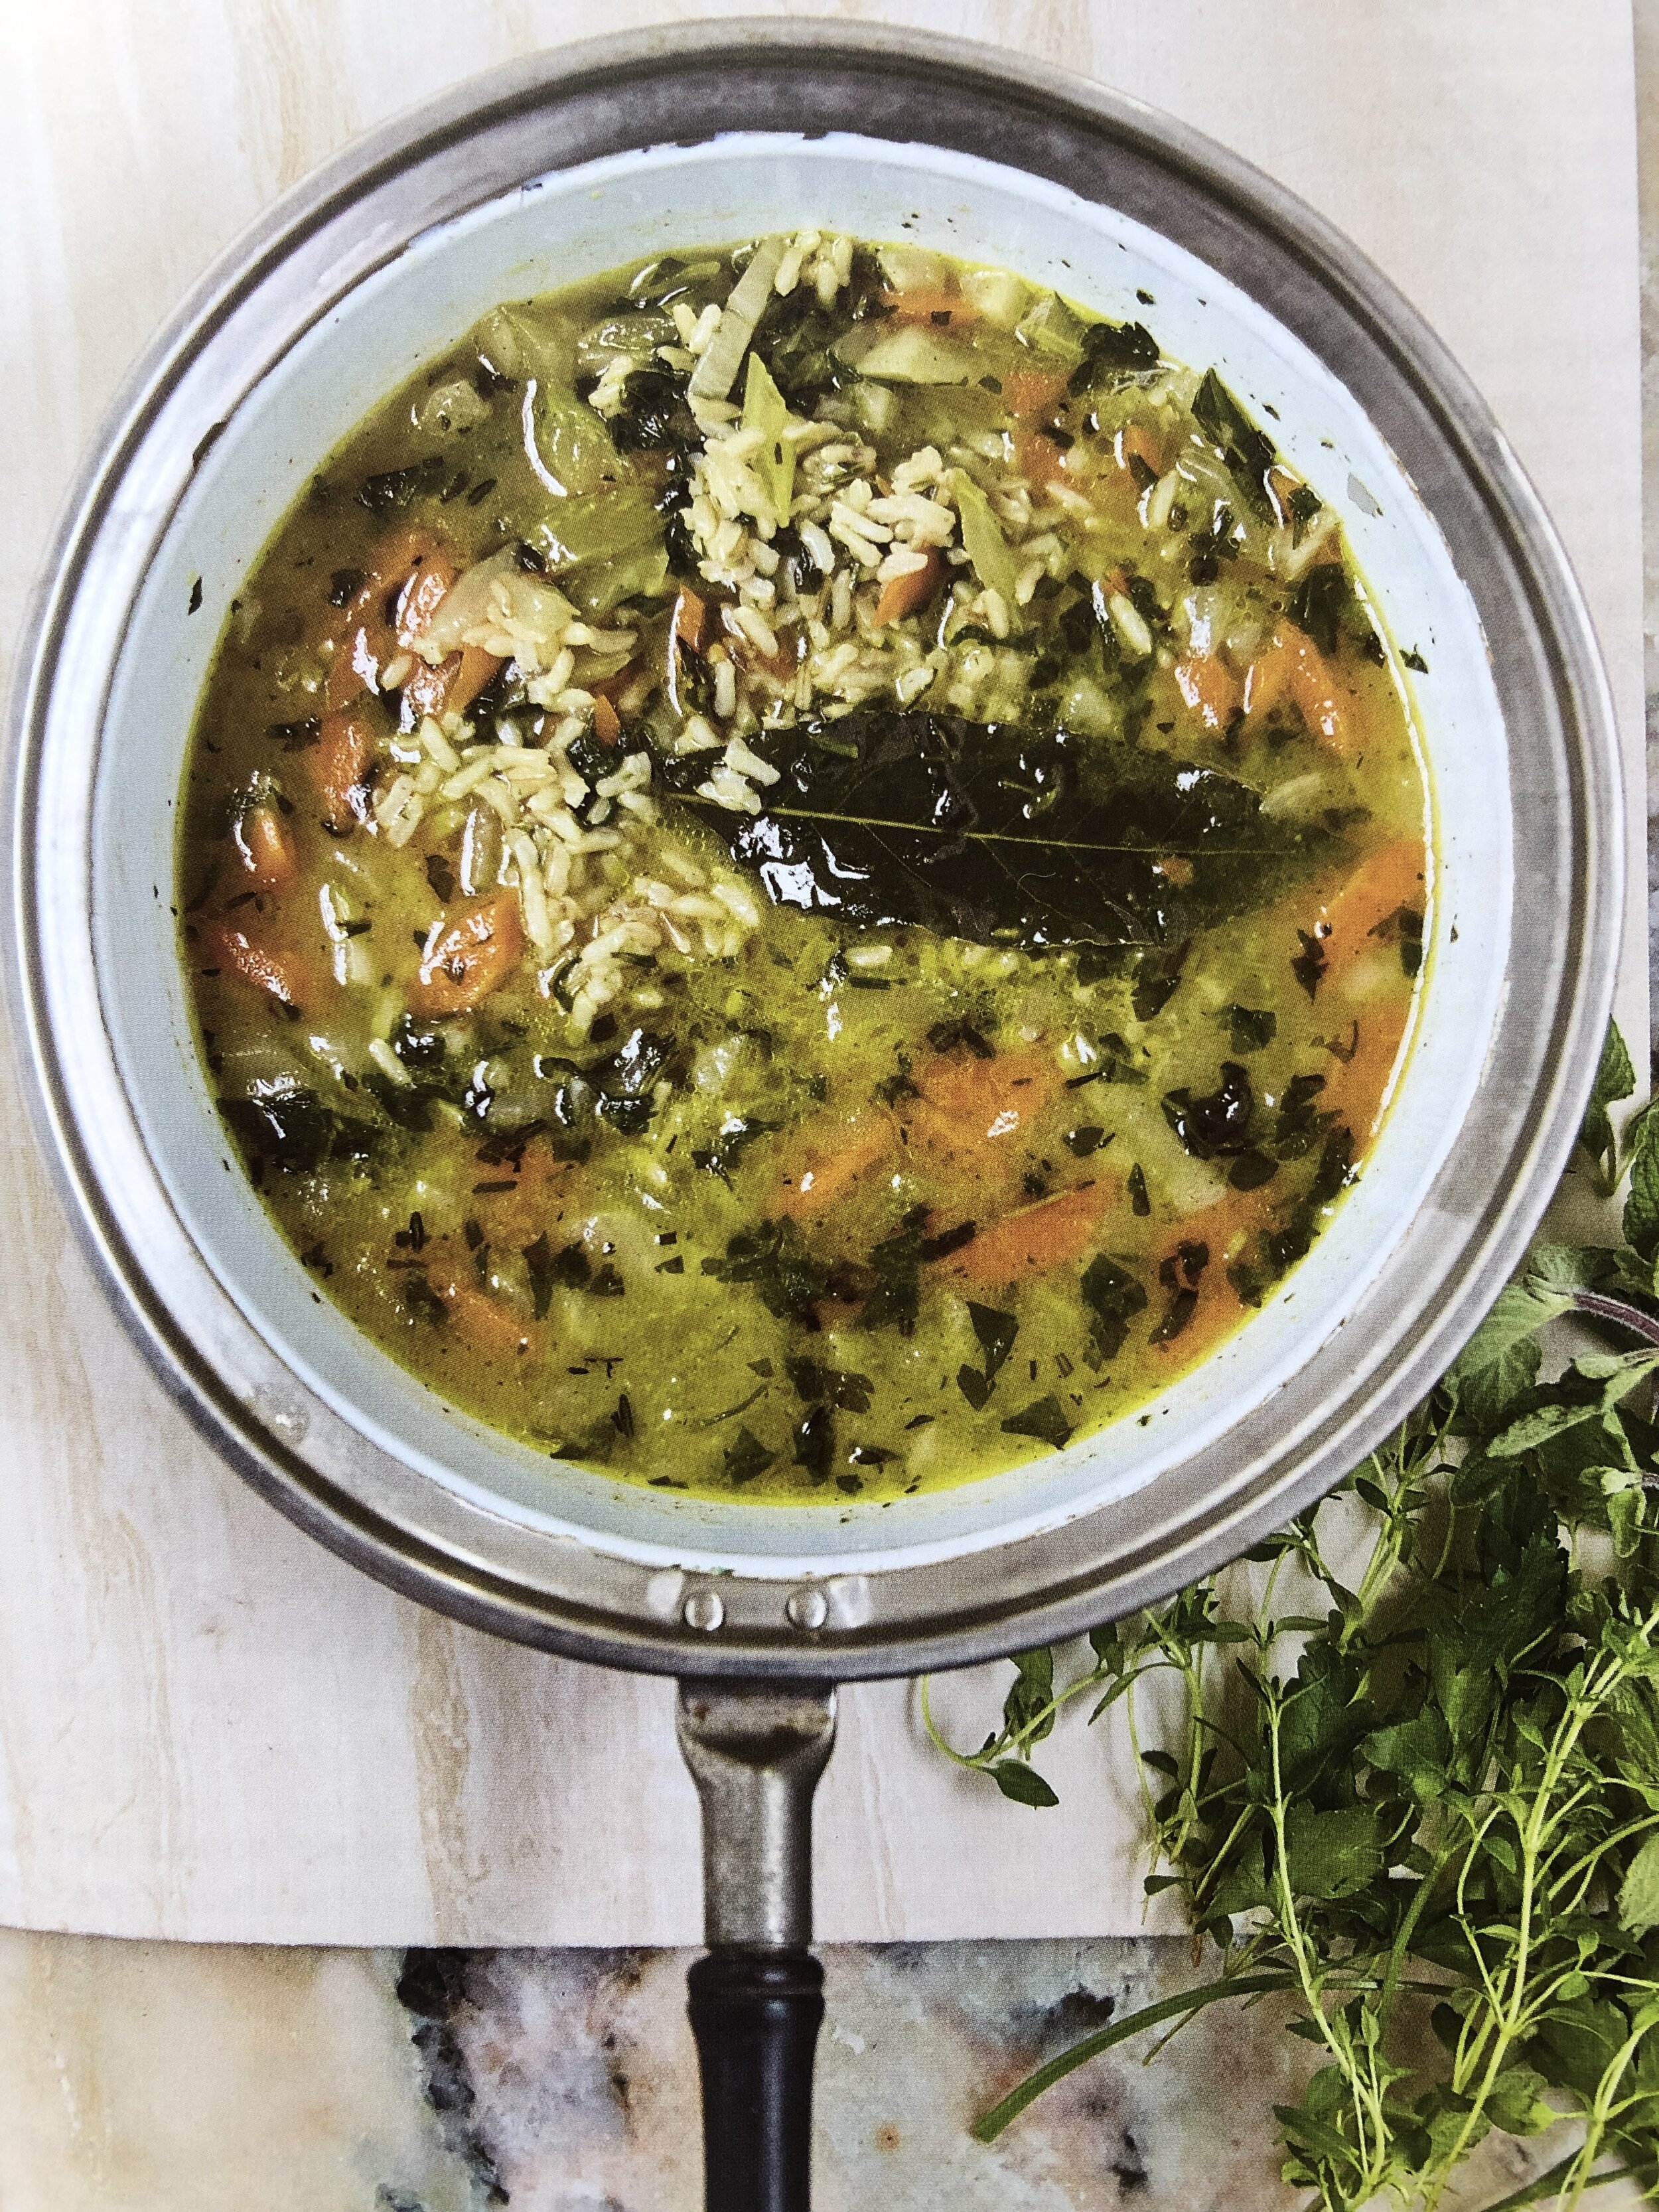
brown rice vege soup.JPG

In winter I’m always looking for simple and nutritious soup recipes, as they’re often my lunch or dinner staple. This recipe is from the East by West Cookbook by Jasmine Hemsley, who was inspired by Ayurvedic philosophy and recipes. The soup, dahl and casserole recipes in this book are epic!

This soup is fantastic if your digestion is seriously upset and in need of some TLC. The chicken stock is fortifying and calming to your tummy, and the soaked brown rice is easy to digest and filling.

This recipe is super simple, super tasty and really nutritious. If you’re looking for something a little more substantial, top it with some grilled fish or some scrambled eggs. Be liberal with the fresh herbs that you add at the end, they’ll take the taste to the next level!

Brown Rice Vege Soup

Ingredients:

1T olive oil

1/4 cup fresh parsley

1/4 tsp dried rosemary

1/2 tsp dried oregano

1/2 tsp dried thyme

1 stick celery, diced

1 medium carrot, diced

1L or 4 cups of chicken stock (organic if possible)

1/4 cup of brown basmati rice

1 potato cut into pieces

1 bay leaf

1 1/2 cups of green beans

OPTIONAL ADDITIONAL VEGETABLES: asparagus; broccoli; brussel sprouts; kale; leeks; peas

Sea salt

Pepper

2 T fresh herbs chopped finely - basil, rocket, or parsley

Directions:

  1. Soak the brown rice in 2 cups of cold water overnight. Rinse the rice thoroughly and drain it before cooking.

  2. Put 1T of olive oil in a large saucepan over a medium heat. Saute the parsley, rosemary, oregano, thyme, celery and carrot slowly for 10 mins.

  3. Add the stock, brown rice, potato and bay leaf. Bring to a boil and then cover and lower the heat.

  4. Simmer for 1 1/2 - 2 hrs, adding the green beans 20 mins from the end.

  5. Season liberally with salt and pepper and more olive oil if you are craving fats.

  6. Before serving sprinkle with the freshly chopped herbs.

Cumin Guacamole

guac.jpg

This recipe is one of my favourites, and I often make it daily in the middle of avocado season. Guacamole is a fantastic food for your gut, full of anti-inflammatory fats and anti-oxidants.

When your belly isn’t behaving, you’re way better off focusing on a diet that is based around proteins and fats. It’s the sugars and carbohydrates more likely to disrupt the balance of microbes in your gut, causing irritation and inflammation.

Cumin Guacamole

Makes approx 1 cup

Ingredients:

  • 1 mashed avocado

  • 1tsp cumin

  • 1 tsp sea salt

  • 1T lemon juice

Directions:

  1. Peel and mash the avocado.

  2. Add cumin and salt and lemon juice to your taste.

Life Changing Crackers

LFC crackers.jpg

This recipe comes to you from Sarah at My New Roots (one of my favourite whole food recipe blogs!) who is also the creator of The Life-Changing Loaf. The ingredients in this recipe are almost identical to the loaf, just changed up to make easily transportable and dippable crackers.

The bulk of our days is often spent with wheat in one form or another. Toast for breakfast, sandwiches for lunch and crackers and cheese before dinner. If we can swap out these choices, for anti-inflammatory, whole food, gluten free options, we’ve won half the battle, and what’s more these options can taste better too!

These crackers are amazing paired with white bean hummus, pesto, guacamole or nut butter. They are also amazing on their own as a stop gap between meals. A fantastic source of fibre and plant protein, that helps to balance blood sugars and improve bowel function.

Life-Changing Crackers

Makes 2 baking sheets of crispbread

Ingredients:

1 cup / 135g sunflower seeds
½ cup / 90g flax seeds
1/3 cup / 50g pumpkin seeds
¼ cup /40g sesame seeds
1 ½ cups / 150g rolled oats
2 Tbsp. chia seeds
4 Tbsp. psyllium seed husks (3 Tbsp. if using psyllium husk powder)
1 ½ tsp. fine grain sea salt
1 Tbsp. maple syrup (for sugar-free diets, use a pinch of stevia)
3 Tbsp. melted coconut oil or ghee
1 ½ cups / 350ml water

Rosemary, Garlic and Smoked Salt

Half batch:
2 Tbsp. chopped fresh rosemary
¼ – ½ tsp. garlic powder (depending on how strong you like it)
smoked sea salt, to taste

Directions:

  1. In a large bowl combine all dry ingredients, stirring well. Whisk maple syrup, oil and water together in a measuring cup. Add this to the dry ingredients and mix very well until everything is completely soaked and dough becomes very thick (if the dough is too thick to stir, add one or two teaspoons of water until the dough is manageable). Divide the dough roughly in half, and set aside one half.

  2. Place one half of the dough back into the bowl and add any flavouring you like. Gather into a ball and place it between two sheets of baking paper. Using a rolling pin, firmly roll out into a thin sheet. Remove top layer of baking paper and using the tip of a knife, score the dough into shapes you like (I chose large rectangles but it’s up to you). Repeat with remaining half of dough. Let sit out on the counter for at least 2 hours, or all day or overnight.

  3. Preheat oven to 350°F / 175°C. Using the baking paper, slide the dough onto a cookie sheet and bake for 20 minutes. Remove cookie sheet from oven, flip the whole cracker over (if it breaks a bit, don’t worry!) and peel the baking paper off of the back. Return to oven to bake for another 10 minutes, until fully dry, crisp, and golden around the edges.

  4. Let cool completely, then break crackers along their scored lines and store in an airtight container for up to 3 weeks.

White Bean Hummus

hummus.jpg

Hummus had been a mainstay in my diet for a long time. It’s full of protein, gluten, dairy and sugar free, and seriously yummy served with a good quality cracker. Then someone pointed out to me the havoc that chickpeas play on a dodgy digestive tract, and suggested I cut the hummus for a few weeks and observe the result.

I couldn’t believe it - no more gas, bloating and discomfort at the end of the day - just from avoiding one food group. If you are struggling with your digestion, chickpeas are one food group I encourage you to put down for a time. Sprouting them before and cooking them well definitely improves their digestibility, but how many of us really have time for that?

This white bean hummus is made with cannellini beans, which are much more gentle on the digestion, and contain more protein and fibre than chickpeas. Serve with raw veggies like carrot or capsicum, or as a dip with wholefood gluten free crackers. Can also be used as the protein portion of a salad or a wrap.

White Bean Hummus

Makes 1 1/2 cups

Ingredients:

  • 1 can cannellini beans (15 oz), drained and rinsed

  • 2 heaping tablespoons tahini

  • 2 tablespoons extra virgin olive oil

  • juice of 1 large or 2 small lemons

  • 1 clove garlic, minced

  • a couple twists of himalayan salt grinder

  • a couple tablespoons of water as needed to thin

vary up your hummus with these optional add ins:

  • 1/4 teaspoon or so of cumin

  • 1/2 teaspoon or so dijon mustard

  • herbs like chives or basil

Directions:

  1. Place ingredients in food processor, except water, and blend until desired consistency.

  2. Taste for flavour adding anything more to your liking…more garlic? more lemon? more tahini? more salt? blend again. Add water one tablespoon at a time to thin if needed (when using as a sandwich spread or binder I prefer a thinner hummus and will add a few extra tablespoons of water to thin it out nicely).

  3. Serve however you like! It’s great either at room temp or chilled.

  4. Store in airtight container in refrigerator for up to 6 – 7 days.

Chocolate Bliss Balls

chocolate bliss ball.jpg

Dr Libby is an incredible motivational speaker who has made sophisticated naturopathic concepts understandable for the average person, in the process empowering people to be proactive about their health.

This recipe has been round for yonks, and is such a go to if you are looking to minimise sugar in your life. They’re full of whole foods and fat and protein, so you feel satiated and nourished. But they definitely hit the spot when you can’t ignore the sugar cravings.

Chocolate Bliss Balls

Makes approx 20 balls

Ingredients:

  • 2 cups walnuts, halves and pieces

  • 1 cup sunflower seeds

  • 1 cup coconut, shredded

  • 2/3 cup cocoa powder

  • 8 fresh dates, pitted and coarsely chopped

  • 2 tablespoons water

  • Pinch of salt

  • 1 to 3 drops peppermint oil (optional)

Directions:

  1. Combine the walnuts, sunflower seeds, dates and coconut in the bowl of a food processor. Pulse for 30 to grind the ingredients.

  2. Add the cocoa powder, salt, water and the peppermint oil to the bowl and process until the mixture forms a paste.

  3. Form the paste into medium sized balls by rolling a portion of the paste between your palms. Place the finished balls on a tray lined with waxed paper and chill for at least 30 minutes before serving.

Little Bird Green Apple and Avocado Smoothie

greensmoothie.jpg

I’m an avid fan of the Little Bird Unbakery, and Megan the founder is an incredible chef. The taste combo of banana, green apple and avocado is exceptional!

The difference with this smoothie is the addition of fats in the form of avocado and coconut oil. This gives it real nutritional punch, and can definitely be a stop gap meal if you’re eating on the run.

Green Apple and Avocado Smoothie

Serves 1 large glass

Ingredients:

1 frozen banana cut into pieces

1/4 green apple (the green part is not essential, but the tangy taste of green apples balances well with the banana)

1/4 avocado

2tsp coconut oil

3/4 cup of spinach or any fresh green leafy veges including kale

1/4 lemon, peeled

Up to 10 mint leaves

1/2 cup coconut water

1/2 cup ice

Directions:

Put all ingredients in a blender and blend until smooth, approximately 30 seconds.

Eggs Eggs Eggs

egg1.jpg

Unless you’re allergic to them, eggs are a fantastic staple if you are looking to heal your gut. They’re full of protein and healthy fats that nourish the lining of your gut. They’re easy to digest, and they help to balance your blood sugar, reducing your cravings for the junk food that feeds the nasty microbes in your gut.

I’m particularly fond of eggs at breakfast time. A good protein hit in the morning sets you up for balanced blood sugar throughout the day, which is the key to staying sensible with food. Vege omlettes are a fantastic brunch option in the weekends.

Eggs are also super easy, it takes literally 2 mins to scramble or fry them on the go. Poached eggs was something I learnt to master over time, as I’m quite addicted to the runny yolk. And boiled eggs are a fantastic snack to put in your lunchbox or handbag, when you need a protein hit to keep you going.

Buy organic or at least free range. Chickens who roam are feasting on bugs and insects that improve the nutrient density of the eggs that you’re eating.

Fried Whisked Egg and Fried Whole Egg

Serves 1

Ingredients:

2 organic free range eggs

1T olive oil

Directions for fried whisked egg mix:

  1. Break eggs into a bowl or cup and whisk until mixed.

  2. Heat olive oil in a non-stick frying pan at medium/high heat for 2 mins.

  3. Put eggs into the pan and allow to cook for approx 1 min until it solidifies underneath.

  4. Use a spatula to turn the egg mixture over and cook the other side (approximatley 1 min).

  5. Serve on root veges, roasted kumara or potato hash, life changing loaf or a good quality gluten free bread.

  6. Season with salt and pepper

  7. Serve with sides of cooked leafy greens, roasted tomatoes, avocado or guacamole, or a breakfast salad (which is actually really yummy for breakfast when paired with the savoury eggs!)

Directions for fried whole egg:

  1. Heat olive oil in a non-stick fry pan at medium/high heat for 2 mins.

  2. Crack the egg straight into the fry pan, hopefully retaining the separation between yolk and white.

  3. Allow to cook for 1-2 mins and flip with a spatula when the underside is cooked.

  4. Cook for another 1-2 mins and serve while hot.

  5. Can sprinkle with chilli flakes (for some extra bite) and salt and pepper.

Omelette

Serves 1

Ingredients:

1 or 2 organic free range eggs depending on your appetite.

1T of water for every egg (so if it is a 2 egg omelette you will need 2T water)

1tsp olive oil

Directions:

  1. Heat a large fry pan on medium for 2 mins. Add the oil.

  2. Crack eggs into a bowl and add water, whisking gently until well mixed.

  3. Pour the egg mixture into the frying pan, so that it is very thinly spread.

  4. Allow to cook for approximately 2 mins.

  5. Place your omelette ingredients (my favourite are stir fried veges) on half the egg mixture.

  6. Use a flat spatula to form a lid on the top of the omelette.

  7. Cook for another 30 secs or so and then plate immediately.

Poached Eggs and Boiled Eggs

Serves 1

Ingredients:

2 organic free range eggs

Directions for poached egg:

  1. Fill a small saucepan or deep frypan approximately 2/3 full with water and bring to a rolling boil.

  2. Turn down the heat until the water is bubbling at a very mild simmer.

  3. Carefully crack the eggs into the water, or crack first into a cup and then ease into the water.

  4. Cook for 4 mins which should give you a perfectly cooked white with a runny yolk.

  5. Remove the egg from the water with a slotted spoon.

  6. If you wish you can pat it dry with a paper towel and season with salt and pepper.

  7. Serve immediately.

Directions for boiled eggs:

  1. Place as many eggs as you wish to boil in the bottom of a saucepan so they have heaps of space around them, and cover with cold water that is 10cm above the height of the eggs.

  2. Bring to a rapid boil on high heat.

  3. Once the water is boiling, set a timer for how long you wish to cook them for.

    HOW LONG TO BOIL EGGS

    • For soft-boiled eggs: 4 minutes

    • For slightly soft-boiled eggs: 5 minutes

    • For custardy yet firm soft-boiled eggs: 6 minutes

    • For creamy hard-boiled eggs: 7 minutes

    • For firm yet still creamy hard-boiled eggs: 8 minutes

    • For very firm hard boiled eggs: 9 minutes

  4. When the time is up, remove the eggs with a slotted spoon and either serve hot in the shell. Or place under running water or in a bowl of cold water to stop them cooking.

  5. Peel and season with salt and pepper.

Whole Food Protein Smoothie

berrysmoothie.jpg

I’ve always found smoothies a highly unsatisfying option for breakfast.  I’m typically hungry in the mornings and gulping down a smoothie feels like it barely touches the sides.  Within two hours I’m starving.

This was the first recipe that kept me full for more than 4 hours plus, and it ticked my boxes as far as protein rich and nutrient dense.  

Dr Hyman, the originator from which this recipe developed, specialises in nutrition for balancing blood sugar.  

Whole Food Protein Smoothie

Makes 2 small servings or 1 large serving

Ingredients:

1/2 cup (120ml) unsweetened almond milk

1/2 cup (120ml) filtered water

1/2 medium thin-skinned lemon with rind

1 tablespoon raw almond butter

1 tablespoon raw pumpkin seeds

2 raw walnuts

2 raw Brazil nuts

1/4 medium avocado, peeled and pittted

1  tablespoon extra virgin coconut oil

1cup (80g) frozen berries of your choice - raspberries, blueberries or mixed berries

1/2 banana or 5 dates (optional for sweetness)

Directions:

  1. If you have time the night before, put all the nuts and seeds in water to soak overnight.  This activates them, making them far more digestible in your smoothie. If possible don’t leave out this step, as this smoothie contains a heap of protein from nuts and seeds and may be a little heavy if you don’t do this.  Drain the water before adding contents to the blender.

  2. Add all other ingredients and blend on high for 30-60 seconds.  Add some ice if you prefer your smoothie to be cold and creamy.

Chia Pudding

chiapudding.jpg

Chia pudding for me was the discovery of the century. Being sensitive to sugar means that within two hours of eating cereals (even the really good ones!) I’m starving and ready to murder something. Pancakes are even worse and porridge is a disaster.

Enter chia seeds. A powerhouse superfood that is crammed full of protein, fibre, antioxidants and omega 3s. Used by the traditional people of Mexico and Central America for thousands of years to fuel their bodies for long distance running between settlements.

Prepared with a plant based nut milk such as almond milk or coconut milk, this meal is high in protein and fat, keeps you full for hours, and puts serious petrol in your tank. Add some fresh fruit and some nuts and seeds, and this tastes like an amazing dessert except it’s breakfast time, and you don’t get any of the negative effects of a big sugar hit. It’s win win on every front.

Breakfast Chia Pudding

1 large serving

Ingredients:

3T chia seeds

1 cup of plant based milk (For seriously creamy use coconut milk, but this can be a little overwhelming. I prefer a 50/50 milk of almond milk and coconut milk, but if coconut is not your thing try almond milk or oat milk.)

1/4 tsp vanilla essence

3 T dessicated coconut

Optional:

Fruit - berries (my favourite is raspberries but any of the berries taste fantastic and pack an antioxidant punch), kiwifruit, banana, peaches and nectarines. Literally any fruit that knocks your socks off.

Chopped nuts and seeds - again any combination that rocks your world - pumpkin, sunflower and sesame seeds, chopped walnuts, almonds, macademias or hazelnuts, or a tablespoon of nut butter if that’s your easiest option.

Directions:

  1. Put the chia seeds, dessicated coconut and vanilla in a bowl and combine. Pour over the nut milk and mix well, ensuring where possible that the chia seeds are not clumping together.

  2. Place in the fridge for a minimum of 30mins but preferably 2 hours to allow the chia seeds to swell.

  3. Serve with your ultimate combo of fresh fruit and nuts and seeds.

Posh Porridge

porridge.jpg

For many people, porridge in winter is a staple, and for good reason. It’s warm, it’s a nutrient power house if prepared properly, and it’s a comforting way to start the day. However the rolled oats single serving packs, where you add water and then microwave, are a little less than desirable on the nutrition front.

This recipe asks you to soak the oats overnight (though if you’re pushed for time you can omit this step) making it very gentle on the digestion. It’s sweetened with apple and maple syrup or honey rather than tablespoons of white or brown sugar, and further flavoured with cinammon, ginger and nutmeg. A power packed start to your morning. Yum!

Posh Porridge

Serves 1

Ingredients:

1/2 cup of organic or gluten free rolled oats

1 cup of almond milk, coconut milk or some other type of nut milk or filtered water

1tsp ground cinnamon

1/2tsp grated nutmeg (optional)

1/4 tsp ground ginger (optional)

A squeeze of lemon or lime juice

A pinch of sea salt

TOPPING

1/2 apple, grated

1T maple syrup or honey (optional)

2T coconut yoghurt (optional)

2T nuts of your choice (walnuts and hemp hearts are our favourite for this recipe)

Ground cinnamon to serve

Directions:

  1. If you have time the night before put the oats in a bowl, pour in enough water to cover and soak overnight. If not simply leave out this step.

  2. The next morning combine this mixture with the nut milk or water in a saucepan. Bring to the boil over a high heat and then reduce to a simmer on a medium heat for 10-12 mins until the oats are soft.

  3. Stir in the cinammon, ginger, nutmeg and sea salt and more nut milk if needed.

  4. Serve the chia oats into a bowl and top with grated apple (or cooked apples), honey or maple syrup, nuts and coconut yoghurt if desired.

Lentil and Leek Curry with Leafy Greens

Lentil Leek Curry.JPG

This is one of my winter favourites by Jasmine Hemsley, in her cookbook East by West. The leek and the pumpkin are the perfect winter vege combo to combine with coconut milk. This recipe is packed with seasonal veges and protein from the red split lentils, which are also one of the easiest legumes on the digestion.

Lentil and Leek Curry with Spring Greens

Serves 4-6

Ingredients:

1 medium butternut squash or 1/2 pumpkin

1 large leek, including the green tips, sliced

7.5cm piece of fresh ginger, either grated or finely chopped

400ml can of full fat coconut milk

3 cups of water

1 1/2 cups of red split lentils

1/2 tsp freshly ground black pepper

2 tsp ground tumeric

3 cups of leafy greens - rainbow chard, silverbeet or spinach

1 tsp sea salt

1 packed cup of freshly chopped coriander

1 lime

Directions:

  1. Peel the squash or pumpkin and cut it into 2.5cm chunks.

  2. Put the leek, ginger and squash into a pan with the coconut milk and water. Put the lid on and bring to a medium simmer.

  3. After 15mins add the lentils, pepper and tumeric and stir. Allow to simmer for a further 20mins with the lid on until the lentils are soft and the squash is tender.

  4. Add more water if necessary to reach your desired consistency.

  5. Add the greens, stalks removed, in the last 5-10mins of cooking, so the greens are cooked but not soggy.

  6. Garnish with coriander and freshly squeezed lime and serve.

What to eat during our gut health program

Your diet during our Gut Health program should focus on the following:

  • Copious fresh vegetables

  • Fish and seafood

  • Red meat and chicken but avoiding pork products and all processed meats

  • Eggs

  • Beans and legumes - but being aware of these if one of your issues is excess gas.  Chickpeas should be completely avoided by anyone with gut problems.

  • Nuts and seeds - avoiding excessive levels of peanuts

  • Extra virgin oils such as olive and coconut

  • Whole grains such as brown rice, quinoa, and oats in moderate quantities

  • Some fresh fruit - maximum of 3 servings per day

Core Elements of the Diet

Create an inclusion diet not an exclusion diet

Rather than focusing on what you shouldn’t eat, focusing on having as many foods as possible that promote cellular repair and enhance gut integrity.

Eat a varied diet

As this will give you the best possible chance to absorb the vitamins, minerals and phytochemicals that are the very ingredients that will heal your gut.  Diversity is everything.  Aim for a minimum of 10 different types of vegetables every week, particularly those that are currently in season.

Go mad with vegetables!

If you want to improve your gut function you have to significantly increase the volume of vegetables you are eating.  I’m talking vegetables at every meal and as a significant part of the plate.  For those with problem digestive systems, this often does not mean lots of salad, instead steamed or cooked vegetables are often more appropriate, at times in casserole or soup form.

Root vegetables - kumara (different varieties), pumpkin, squash, potato (in small quantities), beetroot, carrot, parsnip - steamed, roasted or oven baked are a fantastic food group to have on a daily basis.

Leafy greens - are the key to having cells that dance.  A significant portion of these on a daily basis is one of the cornerstones to good health.  Lettuce, spinach, cabbage, rocket, sorrel, parsley, Italian parsley, mint, coriander, watercress, bok choy.  Have one raw salad with as many different greens as possible every day.

Non-starchy veges - of all different colours which contain amazing phytonutrients - celery, capsicum, cucumber, tomato, fennel, eggplant, zucchini, radish, carrots, beetroot.

Onions, leeks and garlic - are often given a bad rep when it comes to digestibility.  These foods can definitely irritate your digestion, but are a fantastic source of nutrients to heal it as well.  So once we’ve reduced the inflammation, aim to include them on a regular basis.

Eat “clean”

Avoiding foods that have been processed in any way and contain chemicals which turn up on ingredients lists as “E” numbers. Any foods that keep for longer than one year should be questioned as to their levels of preservative.  Processed meats such as salami and luncheon sausage contain nitrates, and almost all processed foods contain colours and flavourings to give them a specific taste.

Minimal alcohol

Alcohol has a very detrimental effect on the tight junctions involved in the gut, making it generally inflammatory for people with gut problems.  Drink in moderation, no more than 2 glasses per week if possible. Beware of the mixers you drink as they are often very high in sugar, and the type of wine you drink, as it often contains a lot of the chemical sulphites. Beer and cider are not the friends of an upset tummy. 

Sugar is the greatest enemy to good gut function

So if you’re going to restrict one food group this is the one to focus on.  Sugar feeds all of the microbes that you don’t want populating your digestive system.  The key is to starve them out and feed your good bacteria.  Avoid all sugary cakes, biscuits, ice-cream and soft drink.  Also limit your fruit intake to no more than three serves per day, focusing on low sugar fruits such as berries and melon.

Drink water predominantly

Warmed or room temperature where possible.  Or a good quality herb tea.  The quality of your water can have a huge impact on the microbial balance in your gut.  Consider getting a very good water filter, or buying alkaline pure spring water.  This has a surprisingly powerful effect on balancing gut bacteria.  Avoid coffee, black tea, juice, kombucha and all soft drink.  Drink a minimum of 2L of water or herbal tea per day - preferably 2.5L.  This is very important to start detoxifying your gut.

Fermented foods are amazing

The most beneficial being sauerkraut and kimchi - which I recommend you eat daily.  Also coconut water kefir.  I’m not fond of any forms of fermented dairy for problem tummies.  The inflammatory effect of the dairy tends to cancel out the benefit of the ferment.

Cut down or cut out gluten - which means bread, pasta, cakes and biscuits

Gluten is the most inflammatory food group to your gut behind sugar, and has been shown in numerous studies to create intestinal permeability (or leaky gut). Gluten is found in wheat, barley and rye, but it is wheat that most commonly irritates an inflammed gut. Normal bread contains wheat, but it also contains yeasts, which help your nasty microbes to proliferate.  When healing the gut, cut out normal bread completely.  Instead opt for the Life Changing Loaf (which contains no wheat or yeast), or a good quality gluten free bread.  Sourdough should also be avoided when you are trying to heal your gut.

Focus on protein and fat as food sources rather than sugar and carbohydrates

Protein and fat are much easier to digest for upset tummies than carbohydrates, which often feed the very bacteria in your gut that we are trying to reduce.  So if contemplating how to make up the balance in your plate, opt for protein sources - Fish, Meat, Eggs and Nuts and Seeds and fat sources - avocado, meat, coconut, oil.

Warmed and cooked foods help soothe an inflamed gut

When your gut is inflamed it is as though you have a baby’s gut.  We don’t feed a baby a heap of salad and raw foods that are difficult to digest.  Instead we give them foods that are warm and very well cooked, because they are easy to digest.  A raw food diet is unhelpful if you have digestive problems, as your digestive enzymes will not be strong enough to unlock the amazing components to be found in raw food. 

Nuts and seeds

Are a fantastic source of vegetarian protein as well as many vitamins and minerals.  Consume a wide variety of nuts and seeds, being aware to avoid peanuts where possible as they are very inflammatory, instead focusing on all the other nuts.

Seeds - sesame, pumpkin, sunflower, hemp

Nuts - almonds, walnuts, Brazil nuts, macadamias, pine nuts, pistachios, cashews

What’s the deal with beans and legumes?

So what does that look like practically?

Check out our recipes which are all balanced to help heal your gut, and get an idea of the types of foods to eat on a daily basis.

Kumara Chips

sweet-potato-fries-726x1024.jpg

Kumara chips are quite simply my ultimate comfort food. Sweet and savoury at the same time, served with lashings of mayo (a fresh one that doesn’t contain additives and preservatives) and salt and pepper, they’re guaranteed to transform the bleakest of days.

Kumara packs a significant nutritional punch, full of iron, calcium and selenium as well as b vitamins, vitamin c and beta carotene. They’re also easy to digest for problem tummies, and a great source of carbs that is not grain based -so the feel good factor is complete - nutritious and delicious!

Kumara Chips

Serves 6

Ingredients:

5 small kumara, or 3 large kumara. Red Kumara (the ones that look purple) hold their shape the best. Orange and gold kumara are sweeter in taste, but will be more mushy as chips.

Olive oil

Fresh or dry rosemary (optional)

Salt and pepper

Directions:

  1. Preheat your oven to 200 degrees celcius.

  2. Wash your kumara but don’t peel it if they are relatively fresh.

  3. Slice your kumara into long fat fingers.

  4. Arrange in an oven proof dish and toss with olive oil until each chip is sufficiently coated but not drowned.

  5. Destalk the fresh rosemary and chop finely or sprinkle 1T of dry rosemary over the chips.

  6. Bake in the oven for 25 mins or until the kumara is crisp on the outside and cooked in the middle.

  7. Serve with lashings of mayonaise (try for a fresh one from the refrigerated section of the supermarket.

The Life Changing Loaf

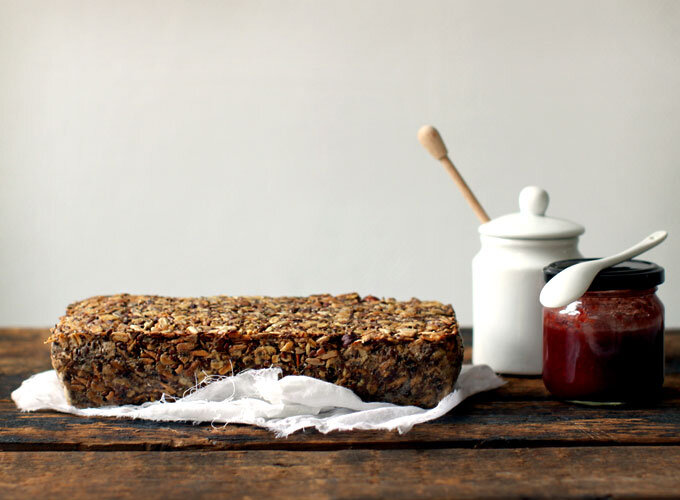
LFC.jpg

When I found this recipe, it really did change my life. We all love bread, but sadly, bread doesn’t always love us. Processed white wheat flour, yeast and next to no protein is a recipe for blood sugar imbalances and gut problems.

Enter, “The Life Changing Loaf” from My New Roots blog. It’s wheat and gluten free (if you use gluten free oats) and packed with protein (from the nuts and seeds) to leave you feeling satiated and balanced. Added bonus, the psyllium husks that bind the loaf together, are a fantastic source of fibre for your bowel health.

You get it, this is an incredibly nutrient dense loaf. But what you really want to hear is that it’s so damn easy to make! No need to knead and no waiting for things to rise. This recipe will become a staple of your diet.

Try topping your life-changing slices with avocado and sliced tomato for a quick, nutritious snack. Or with poached eggs and sauteed greens for a balanced breakfast. Or try a lashing of nut butter with sliced banana for a sweet treat.

If you find that you and oats are not a good match, and you’d prefer to be strictly gluten free, you can swap out the oats for buckwheat flour or buckwheat groats. Check out an alternative recipe here. Nadia Lim has also created a version of this recipe, using gluten free flour, check it out here.

Even better, you can now purchase ready-made Life Changing Loaf made by The Midnight Baker. They call it the Freedom Loaf and you can get an oat or buckwheat version - soooo yum and soooo easy! You can purchase online or at Farro stores Auckland wide.

The Life-Changing Loaf of Bread

Makes 1 loaf

Ingredients:

1 cup / 135g sunflower seeds

½ cup / 90g flax seeds

½ cup / 65g hazelnuts or almonds

1 ½ cups / 145g rolled oats

2 Tbsp. chia seeds

4 Tbsp. psyllium seed husks (3 Tbsp. if using psyllium husk powder)

1 tsp. fine grain sea salt (add ½ tsp. if using coarse salt)

1 Tbsp. maple syrup (for sugar-free diets, use a pinch of stevia)

3 Tbsp. melted coconut oil or ghee

1 ½ cups / 350ml water

Directions:

1. In a flexible, silicon loaf pan combine all dry ingredients, stirring well. Whisk maple syrup, oil and water together in a measuring cup. Add this to the dry ingredients and mix very well until everything is completely soaked and dough becomes very thick (if the dough is too thick to stir, add one or two teaspoons of water until the dough is manageable). Smooth out the top with the back of a spoon. Let sit out on the counter for at least 2 hours, or all day or overnight. To ensure the dough is ready, it should retain its shape even when you pull the sides of the loaf pan away from it it.

2. Preheat oven to 350°F / 175°C.

3. Place loaf pan in the oven on the middle rack, and bake for 20 minutes. Remove bread from loaf pan, place it upside down directly on the rack and bake for another 30-40 minutes. Bread is done when it sounds hollow when tapped. Let cool completely before slicing (difficult, but important).

4. Store bread in a tightly sealed container for up to five days. Freezes well too – slice before freezing for quick and easy toast!